

Table of Contents
Looking at a Steam Deck and feeling like its screen colors are a little…lacking compared to other IPS panel displays? It isn’t just you: adjusting the Steam Deck’s screen is actually one of the more popular modifications to make to the device, especially since the release of the Switch OLED has started putting serious pressure on visuals in the handheld market again.
The PS Vita had OLED, too…forever ago. It might’ve been a little early back then, or PlayStation was just in a bad market spot for it. In any case, the Vita was the last handheld we saw that really brought competition to Nintendo’s market domination until the Steam Deck launched, bringing console-level pricing into the handheld gaming PC market.
Now, though, the Switch OLED is enjoying a comfortable spot on top of the “best-looking” handheld market, even though its hardware and actual performance is quite weak compared to Steam Deck. There’s nothing we can do to turn a non-OLED screen into an OLED, of course, but there’s no reason Steam Deck owners should just give in to having a worse viewing experience because some handhelds have a fancier screen. Let’s get into some more detail.
A Brief on the Steam Deck’s Screen and Its Shortcomings
November 2023 Update: At the time of writing, it seems that Valve has decided to address Deck’s biggest weakness by replacing the mid-range and high-end models of the Deck with an OLED Steam Deck model! If you have an OLED Deck, you can still try out VibrantDeck through standalone (detailed in this article) or Decky Loader, but you most likely won’t need to do that for anything more than minor tweaks, now.
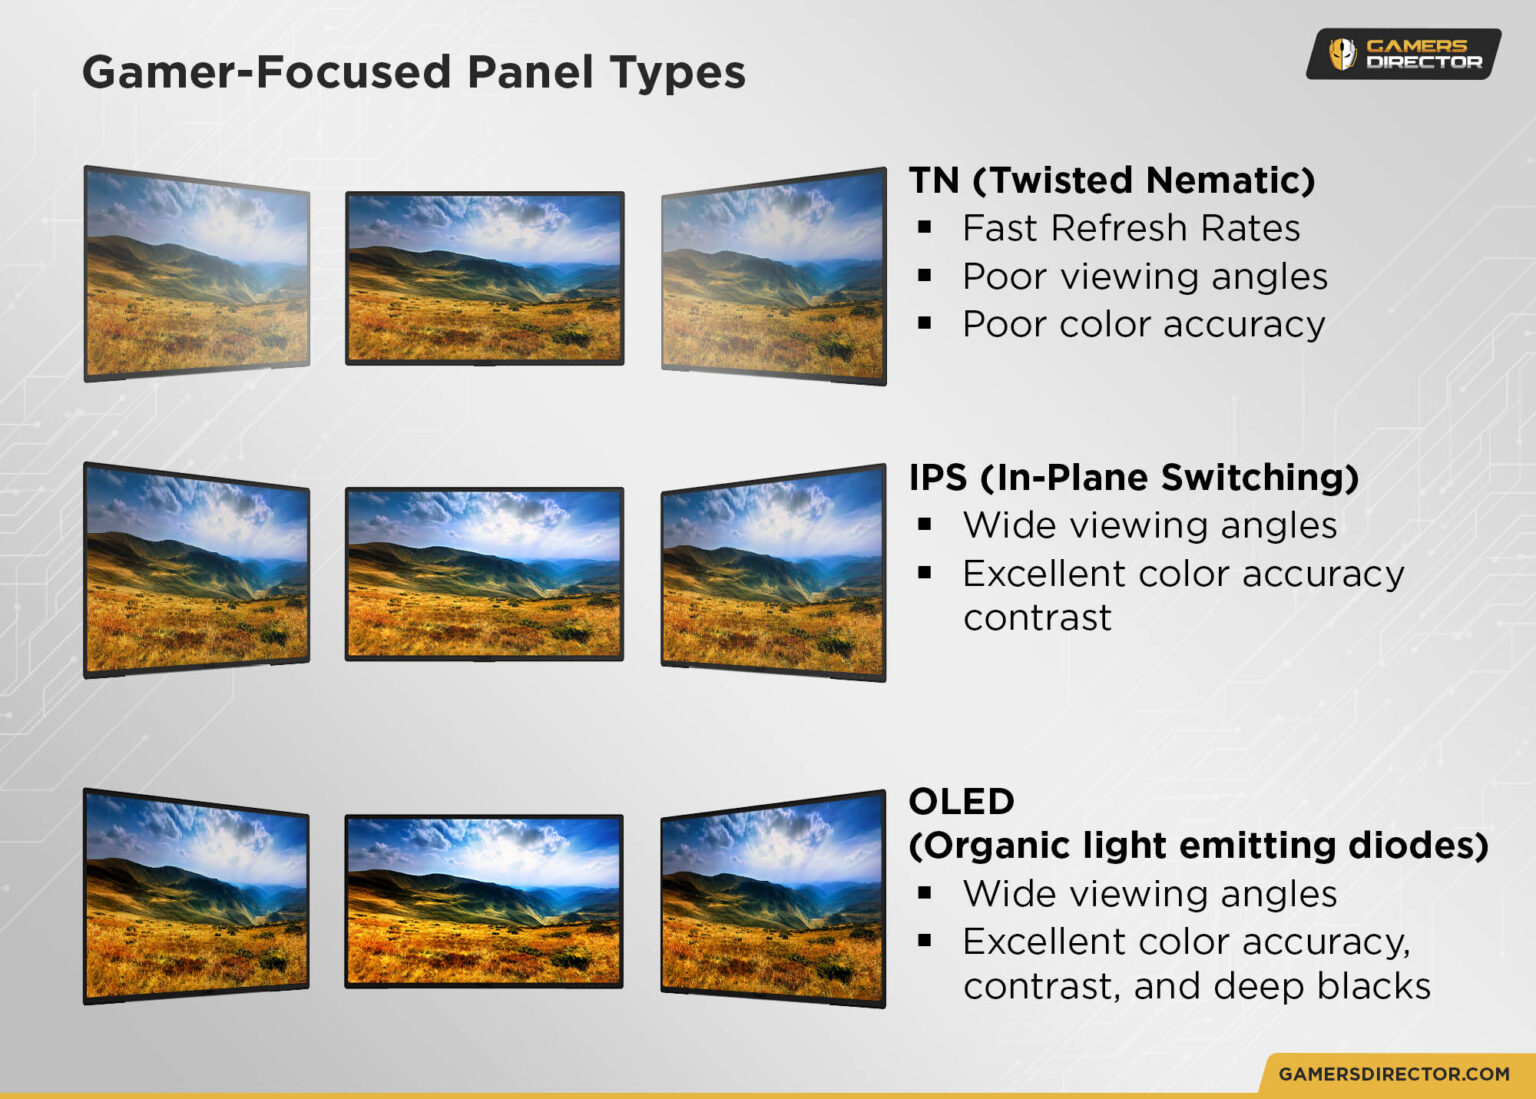
So, let’s start by talking about the Steam Deck’s screen. It’s a 7-inch, 800p, IPS display on a comfortable gaming handheld. Not bad, right? You’d be generally-correct, but you may be surprised at just how accurate “not bad” is as a descriptor, in both directions.
Let’s start with the most major compromise of the Deck display. Despite using IPS, the Deck does not aim for Wide Color Gamut coverage. I’d say the colors generally look “accurate” enough and distinct to my eyes by default, but the Deck is also limited to only 63.7% of the sRGB color gamut. Compared to the kind of visuals you can expect from a gaming monitor or higher-end gaming laptop, this isn’t very good, but for the price it’s still fairly workable.
Despite this downside, the out-of-box calibration for the Steam Deck display mostly looks fine— still better than the non-OLED Switch for sure, in my opinion. I was more than happy to use it without even thinking of adjusting the display colors the first month or so I had the device, just because I was used to accepting compromises like that based on past experiences with handheld consoles.
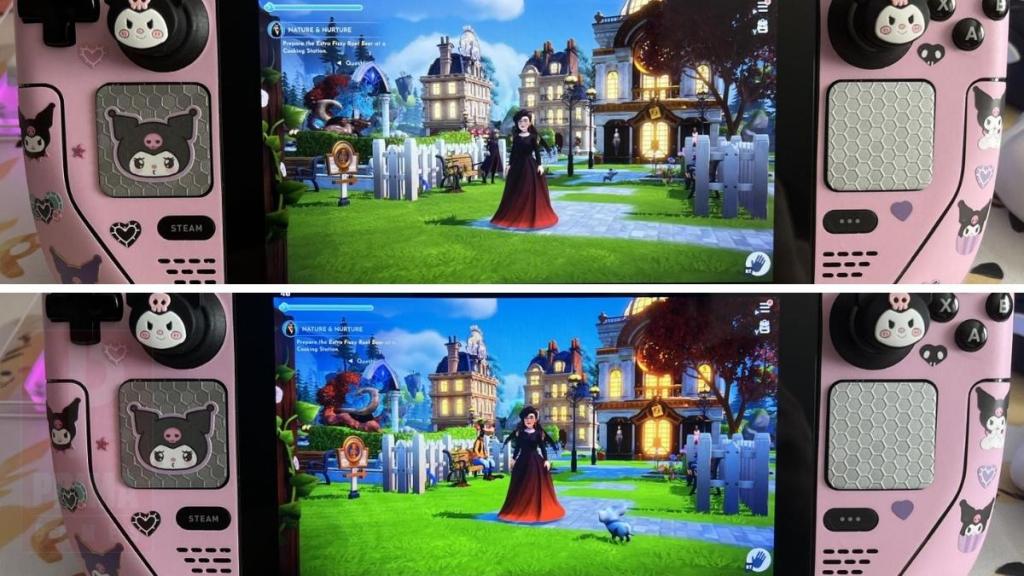
However, the most obvious problem of the Steam Deck display immediately presents itself when you put it side-by-side with the Switch OLED or a proper gaming monitor. It just isn’t particularly bright or vivid. It feels a bit washed-out in the same way that older handheld consoles did, prior to the introduction of built-in screen backlighting.
So, the most straightforward solution to improve your Deck gaming experience is pretty simple. Let’s kick up the saturation!
Introducing VibrantDeck Standalone
Meet VibrantDeck! Or the standalone version, anyway.
The purpose of VibrantDeck is pretty simple. The Steam Deck’s display may not be as high-end as some other models on the market, but the display in and of itself is not the Real problem. The real problem is that Valve played it a little too safe and ultimately ended up giving us an IPS handheld that only looks a little bit better than the regular Switch before you dive in and start adjusting the screen settings for yourself.
After making these changes, the Steam Deck looks a bit more comparable to the likes of the Switch OLED! Unfortunately it can’t simulate OLED per-pixel dimming for those insane contrast levels we all love, but we can put this 63.7% sRGB coverage to better work, especially on a handheld gaming device. It’s not like you’re doing graphic design on the Deck’s 7-inch screen.
Anyway, let’s dive into the how-to.
Why Not Use Decky Loader For VibrantDeck?
Compared to Decky Loader, which somewhat fundamentally modifies the functions of the Steam Deck, the standalone version of VibrantDeck is dead simple to set and forget without really needing to think about it at all afterwards. That plus the relatively young age of the Steam Deck plugin marketplace at the time I originally applied this tweak to my own device meant I opted against using Decky Loader for this article, but I’ll be covering Decky Loader quite soon as well.
The main benefit of using this standalone compared to the VibrantDeck plugin available on Decky Loader is that standalone functionality. While Decky Loader is known to occasionally break and require reinstallation after system updates, I’ve not once had this issue with the standalone version of VibrantDeck, which I consider one of the best tweaks you can make to the Steam Deck.
There are some downsides to not using the Decky Loader plugin version of VibrantDeck, though— including the inability to set individual game profiles and adjust more than just saturation. However, I’ve used the standalone Vibrant Deck’s saturation adjustment alone for quite a while, and found it very nice on its own, providing a viewing experience more comparable to my IPS monitor than the out-of-box low-saturation picture offered by the Deck.
Installing Vibrant Deck Standalone
Now let’s get into it!
Step 1: Open Desktop Mode
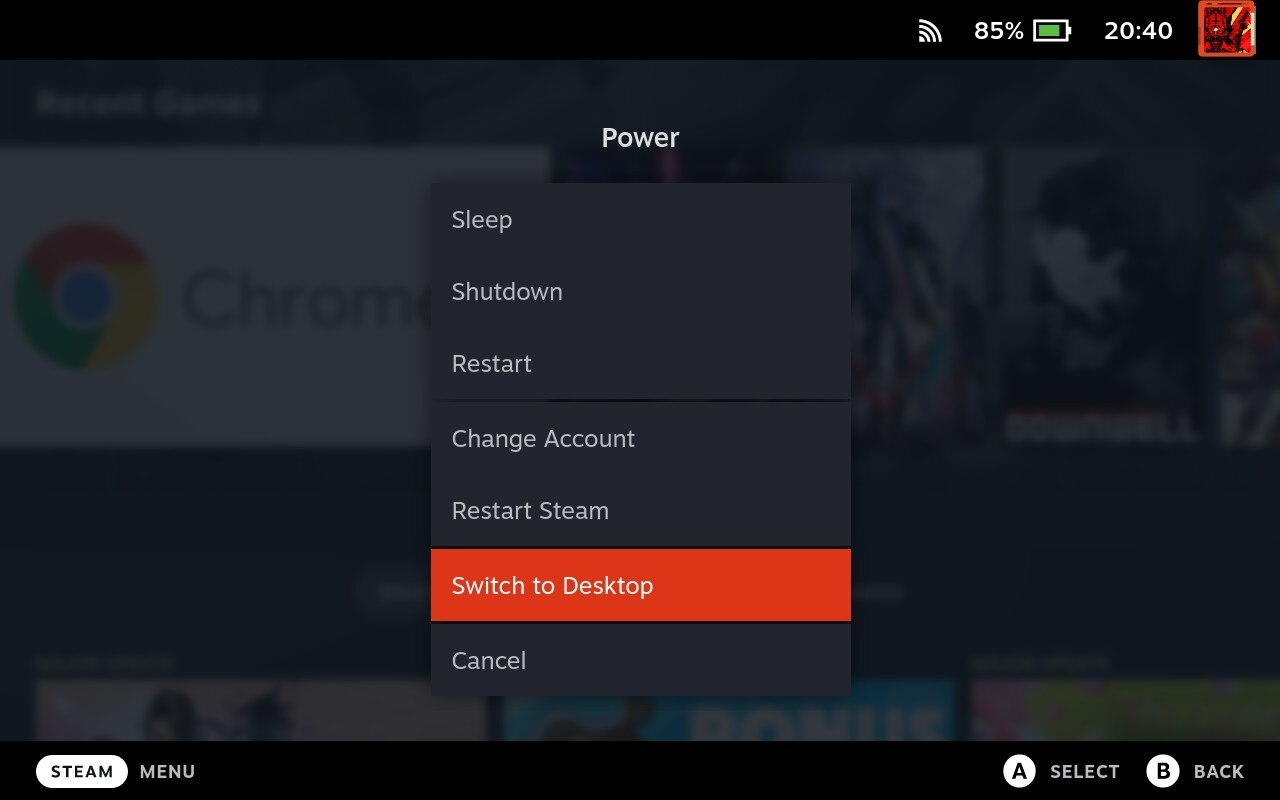
First and foremost, you’re going to need to enter Desktop Mode on Steam Deck for this guide. I recommend using a Docking Station with a mouse, keyboard, and external monitor to make Desktop Mode use a little easier, but fortunately you can still do everything with an undocked handheld, it’ll just be a little more tedious.
To enter Desktop Mode, just hold down the power button until you get the context menu that lets you Switch to Desktop. I’ve embedded a screenshot of this below.
Step 2: Open your Konsole
Now that you’re in Desktop Mode, go ahead and get your Konsole (Terminal) prepared. All you need to do is click on the Start button and start typing “Kon” to get your Konsole prompt.

If you haven’t been in Desktop Mode before and are undocked, use the Right Touchpad for mouse input and Steam Button + X to pull up the onscreen keyboard.
Step 3: Copy and Paste The Install Command
Once the Konsole is open, it’s time to get the Install Command you need to get VibrantDeck up and running. If you’ve been reading this in Desktop Mode from the get-go, you can go ahead and snag the code you’re looking for below.
Alternatively, you can search for “Vibrant Deck Cli” to pull up the GitHub page for the standalone version, but we’ve included everything you need from that GitHub page in this guide, including the command you’ll be using to install VibrantDeck below.
Either way, the install command is
curl -sL https://github.com/agustinmista/vibrant_deck_cli/raw/main/install.sh | sh
Just copy and paste that into your Konsole, and hit Enter.
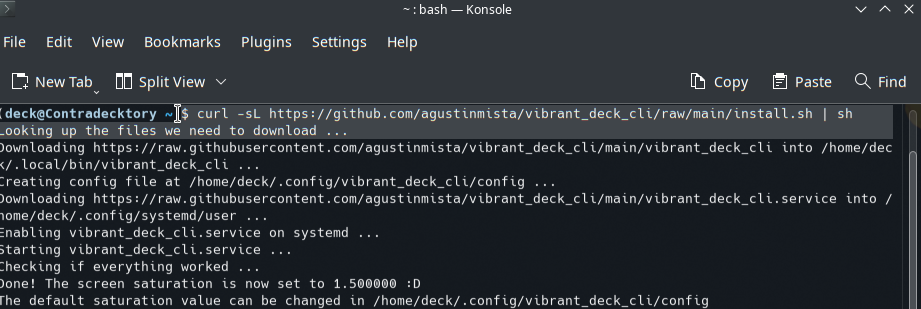
Congratulations! You’ve installed the standalone version of VibrantDeck, and it has automatically increased the Steam Deck’s saturation by…50 percent, assuming that “1.5” is a multiplier on the system’s base saturation. It definitely looks better to my eye, but you can adjust it up or down to your whims.
How To Tweak VibrantDeck Afterward
Note: VibrantDeck’s changes will only apply within Gaming Mode. Desktop Mode will be unaffected by any changes you make here, so be sure to at least try the basic VibrantDeck setup at 1.5 Saturation before you use this part of the guide to adjust it further.
Step 1: Open Dolphin File Manager
Still looking to adjust VibrantDeck? Let’s get to it.
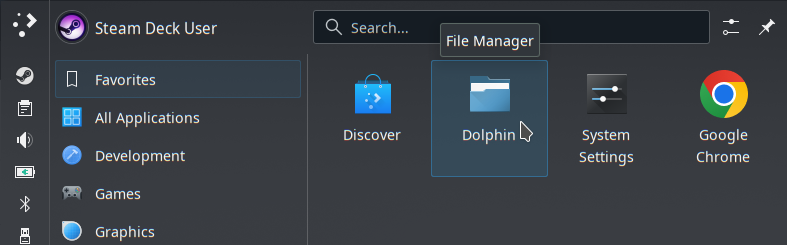
Start by opening your Dolphin File Manager. You don’t even need to type anything, this should be a default “Favorite” seen immediately by clicking the Start button.
Step 2: Copy The File Path Given in Konsole, or From This Section
Now, you’ll want to copy the file path that was spat out in Konsole earlier, or from this section, and paste it into the Dolphin Address Bar. I’ve placed this path below, should you need to copy and paste it from our guide:
/home/deck/.config/vibrant_deck_cli/config
Step 3: Paste into Dolphin Address Bar, Hit Enter
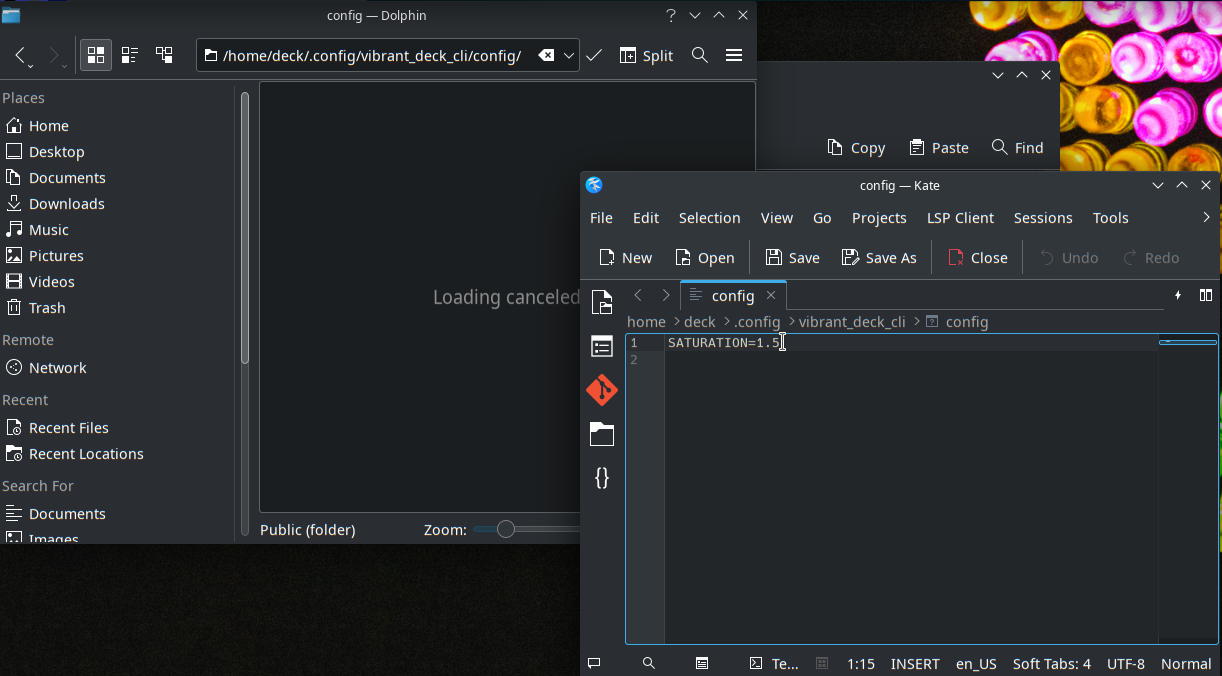
Congratulations! You now have the config file open, and you can adjust that Saturation setting to your heart’s content. I think the “1.5” is just fine, personally, though. Since the standalone VibrantDeck doesn’t support per-game profiles, I’d worry about setting it to a number too high or too low, since it may look worse in some games than in others.
The 1.5 setting seems pretty balanced, at least in my experience.
Parting Words
And that’s it, for now!
Pretty soon I’ll be covering Decky Loader, which includes a superior version of VibrantDeck in convenient plugin form, but for now I wanted to cover this “Essentials” guide, especially for those who just want a quick fix for the Steam Deck’s oddly dim default configuration. This way, you can pretty much just set it and forget it, and not really worry about updates potentially breaking it.
I hope this article helped! However you feel, consider telling us @GamersDirector on Twitter! Alternatively, you can just go on about your day and enjoy your video games. Either way, happy gaming!