

The Steam Deck is a portable gaming device capable of playing modern games at 30-60 FPS in a handheld form factor, but how does it fare in emulation? Pretty well, it turns out, so I’ll be showing you how to install Emulators on Steam Deck with an all-in-one solution today.
Table of Contents
How do Emulators Work on Steam Deck?
Generally-speaking, the Steam Deck can comfortably emulate most consoles until you start moving into the real emulation heavyweights: Nintendo Switch and Sony PlayStation 3*. With these consoles, it can be harder to get full performance on Steam Deck due to the relative power of those devices. However, anything older with adequate emulation development is still pretty easy for the Deck to emulate, and many titles from those consoles are already available on Steam.
Once you’ve finished this Guide, you’ll be able to launch Emulators and even specific retro games of your choice from within Steam OS on your Deck. This means full access to all of Deck’s best features while playing, including real-time button binding, motion control binding, and even TDP/GPU clock adjustments.
What are we using to install Emulators on Steam Deck?
The all-in-one tool we’ll be using to install emulators on Steam Deck is called EmuDeck.
EmuDeck compiles Steam ROM Manager, RetroArch, and a variety of individual console emulators into a single install package that will get your emulated games up and running as fast as possible.
RetroArch is an emulation front-end with support for most consoles, albeit in the form of what are called “Libretro Cores”. These Cores are individual system emulators and well-supported across platforms, but are often behind the standalone emulator which they are adapted from. (ie, the Dolphin RetroArch core won’t have all the latest features of a current-month or current-year Dolphin release).
Steam ROM Manager is what EmuDeck uses to create Steam Shortcuts for your various Emulators and Emulation Cores, with the ability to get as granular as individual games running on a specific emulator.
How To Install Emulators on Steam Deck
Step 1: Enter Desktop Mode
Before you can start installing emulators on your Steam Deck, you’ll need to hop into Desktop Mode.
To enter Steam Deck Desktop Mode, simply hold your power button for a few seconds in the main menu, and select “Switch to Desktop Mode” from the popup. This is where you’ll need to be for the majority of this guide, but you can safely switch back to “Gaming Mode” once you’ve finished this guide and be able to play all your games from there with little extra setup.
Some quick but important Desktop Mode usage tips:
- Remember the Steam Button + X Button shortcut. This will bring up your On-Screen Keyboard within Desktop Mode, but will not work while Steam is closed.
- Consider plugging in a USB-C hub or dock for keyboard/mouse control (or using Bluetooth) for this guide or other times you’ll be in Desktop Mode for an extended amount of time.
Step 2: Head To EmuDeck.com and Download The Installer to Your Desktop
Once you’re in Desktop Mode, open up Chrome or FireFox and head to EmuDeck.com. Scroll down until you reach the “Download app” button, then click it to start Downloading.
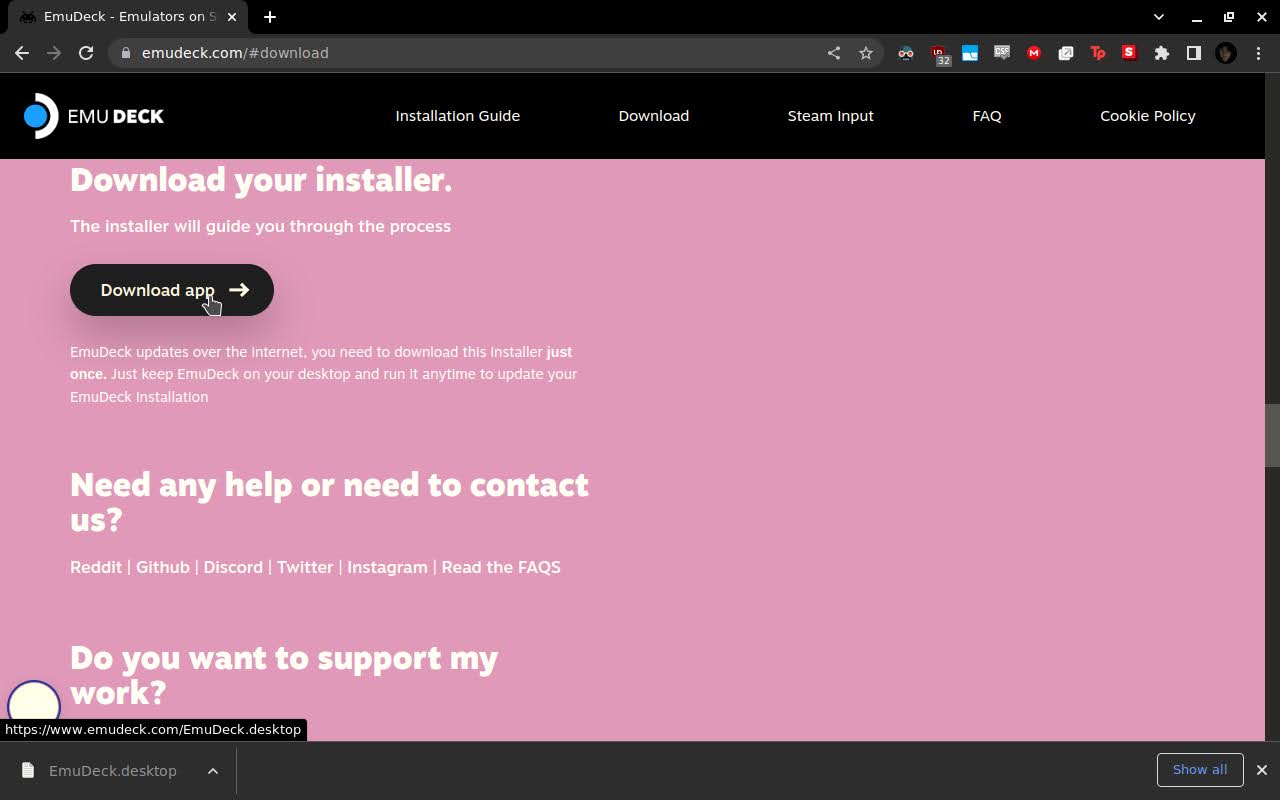
Make sure you set your Download destination as your Desktop folder when doing the download.
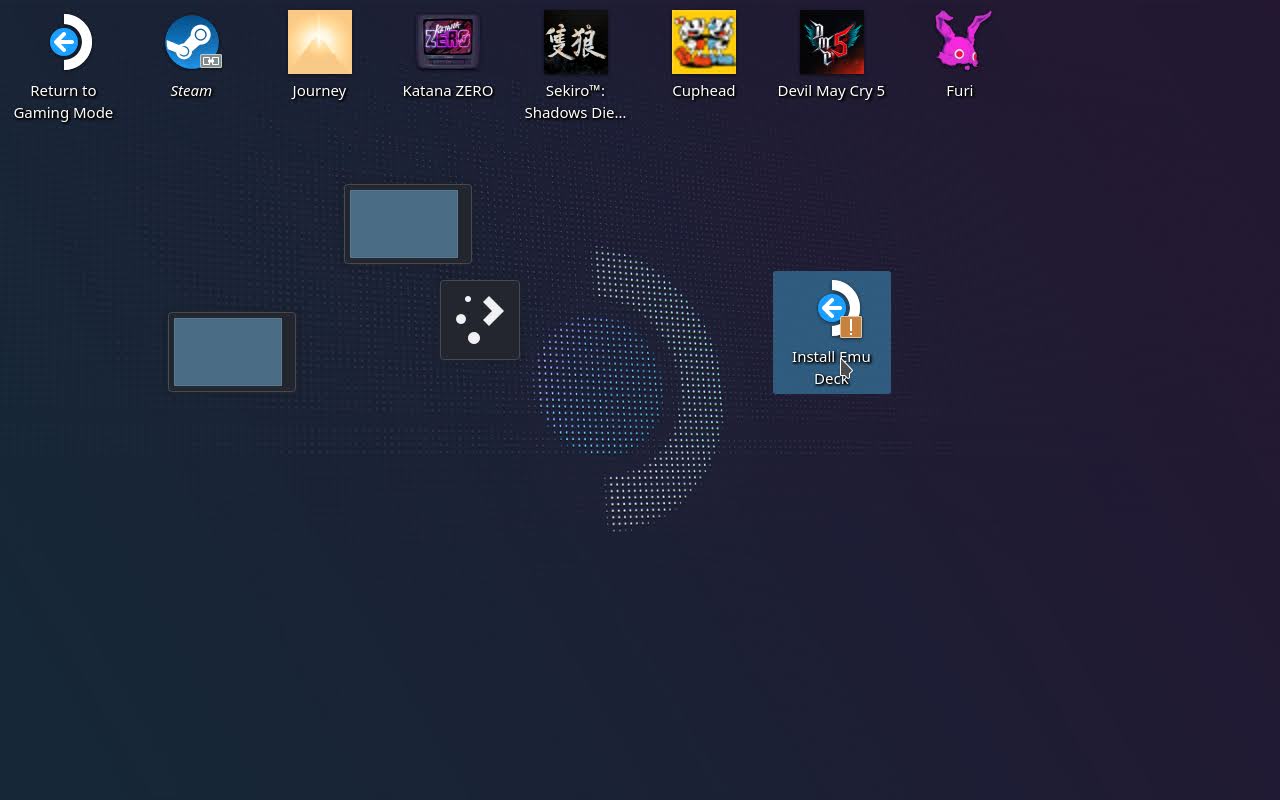
Step 3: Launch The Installer
Once you’ve finished the download, you should see an “Install Emu Deck” button on your Deck OS Desktop. Click it to get started.
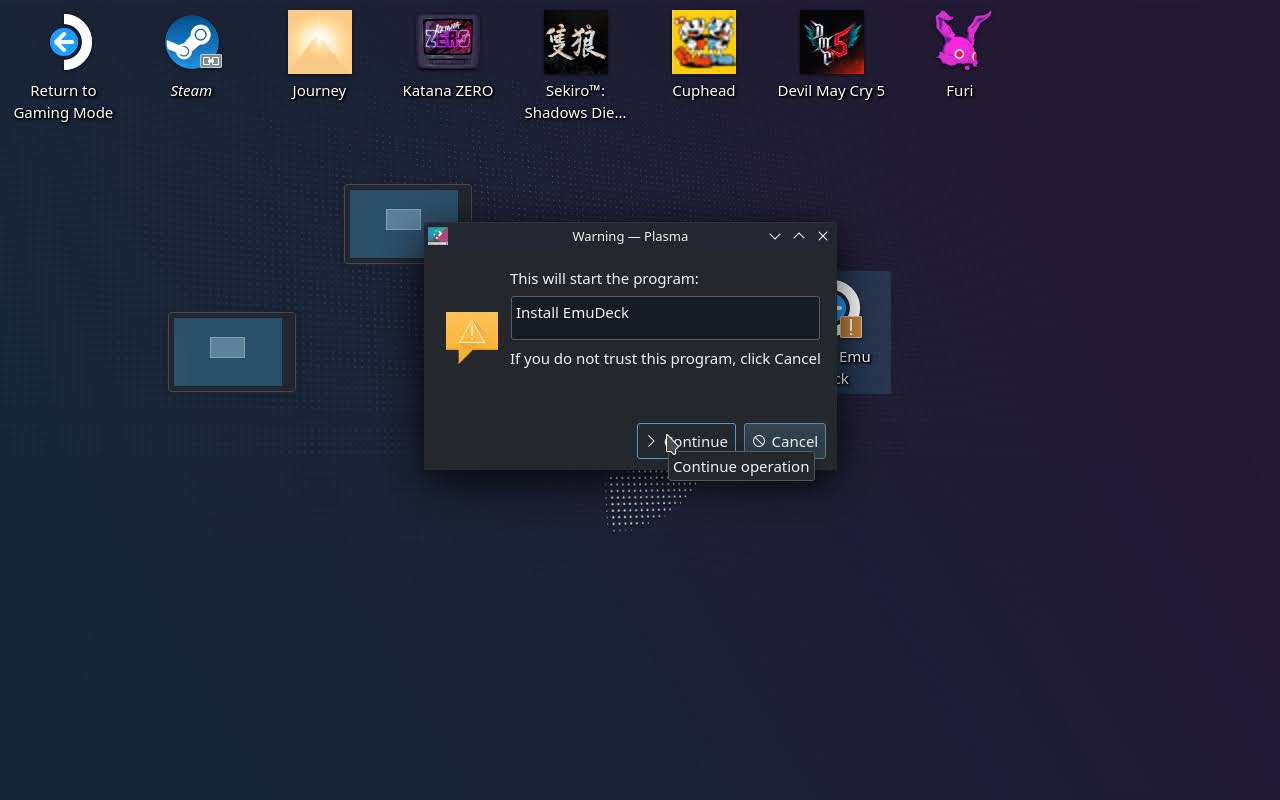
Step 4: Install EmuDeck
Once you get started, you’ll need to confirm EmuDeck’s installation.
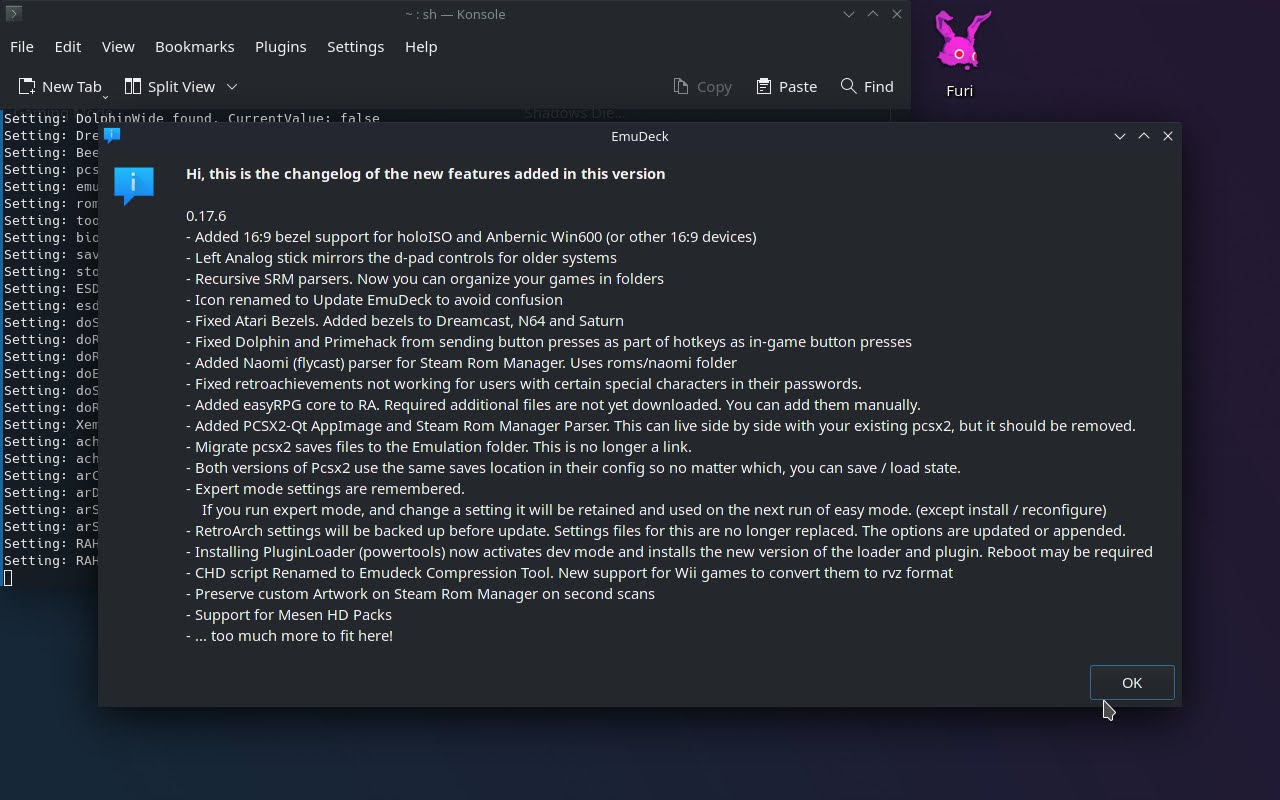
Once installed, EmuDeck will spit out its latest patch notes on its start screen. You can click “OK” to close these.
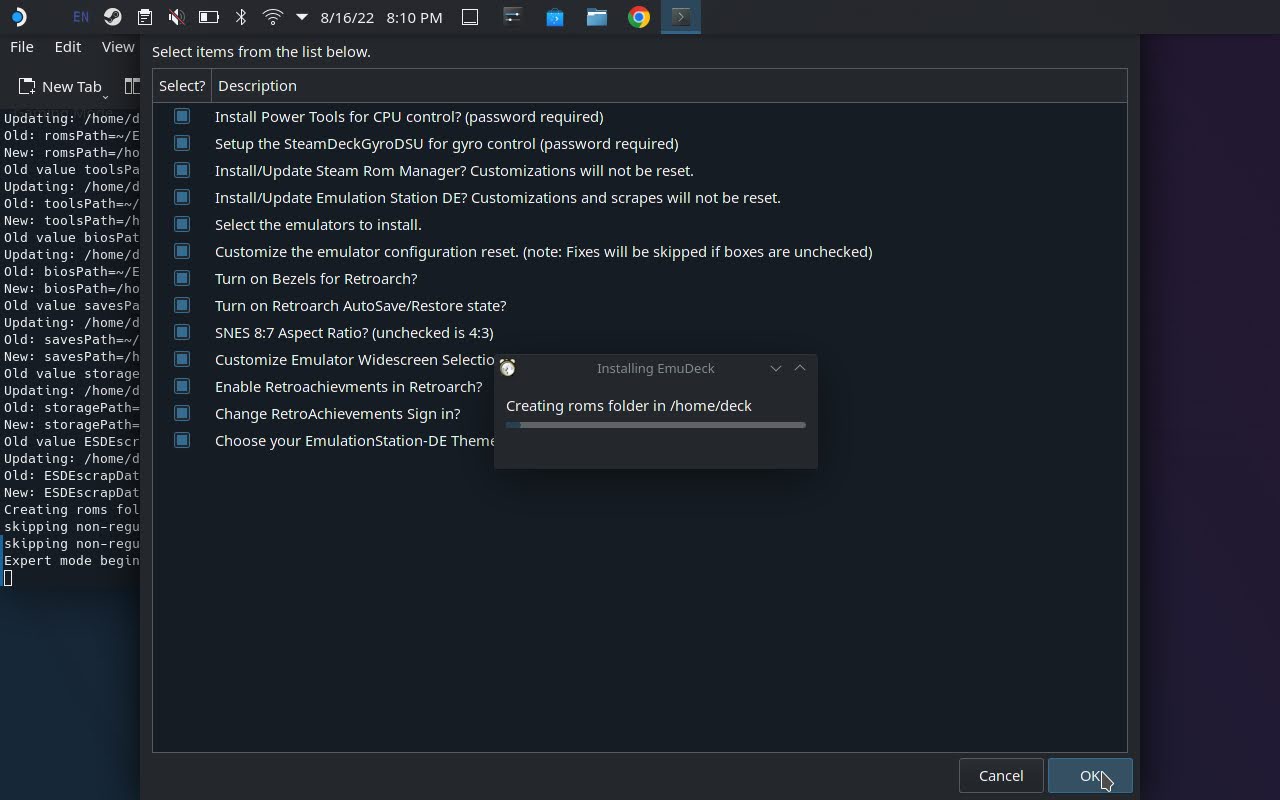
Now, you’ll be given a option to choose between Easy Mode installation or Expert Mode installation. For the sake of this guide, I’ll be going through Expert Mode, just to give you a peek at all the options available for install.

The first screen you’ll get is a list of optional emulation tools that come with EmuDeck. Keep the ones that pique your interest, or delete them all if you choose. I’d recommend at least keeping “Install Steam Rom Manager” and “Install EmulationStation DE”, though, as these are somewhat integral to the rest of the guide.
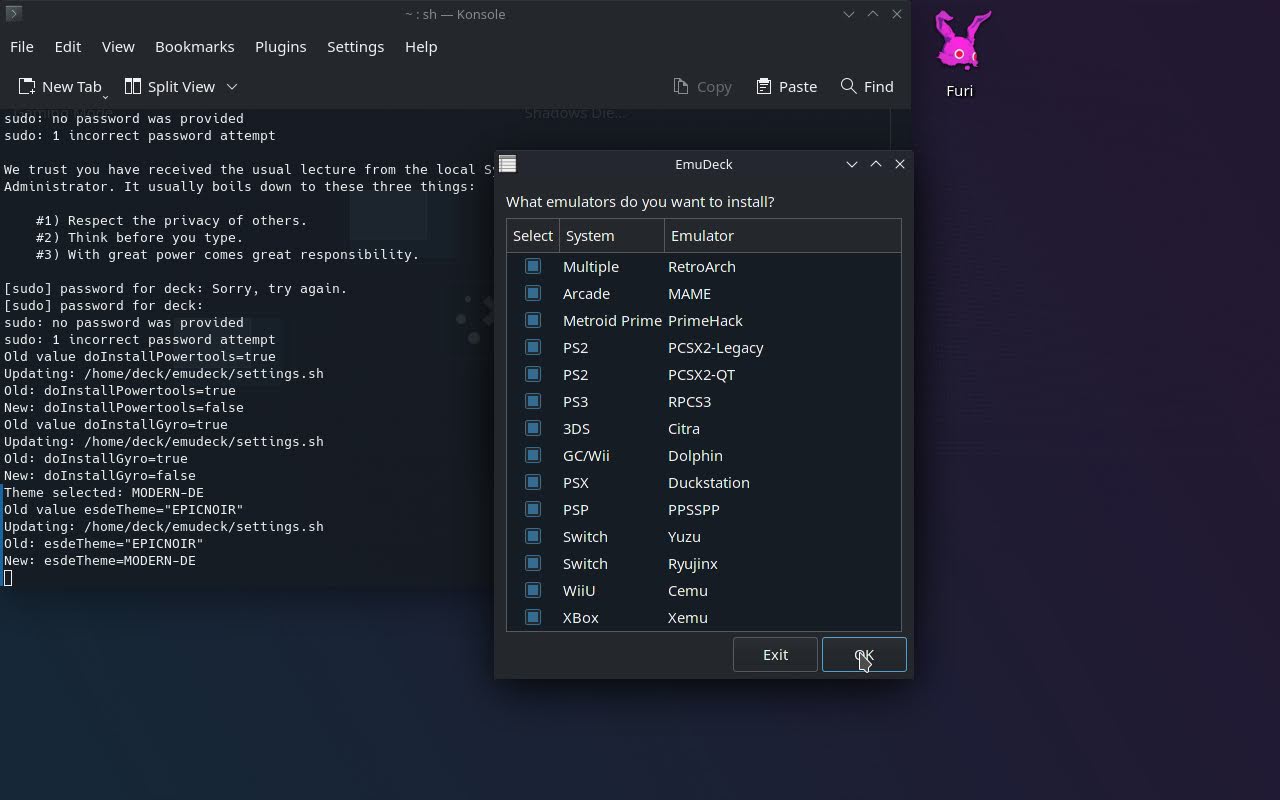
Now, you’ll get to specify which emulators you want to install with your EmuDeck installation. Most of these are fairly self-explanatory, but PrimeHack is a modded Dolphin made specifically for playing Metroid Prime with modern PC mouse or dual-stick FPS controls.
Hit OK once you’ve decided on your emulators, and you’re done! With this part, anyway.
Step 6: Close Steam
Before proceeding with Steam ROM Manager (which should have opened automatically, but can be launched from Desktop if it wasn’t), be sure to close Steam. You’ll need to either right-click the Steam icon in your taskbar and close it for this, or open up Steam’s full window and select “Exit Steam” from the top window menu.
Step 7: Use Steam ROM Manager
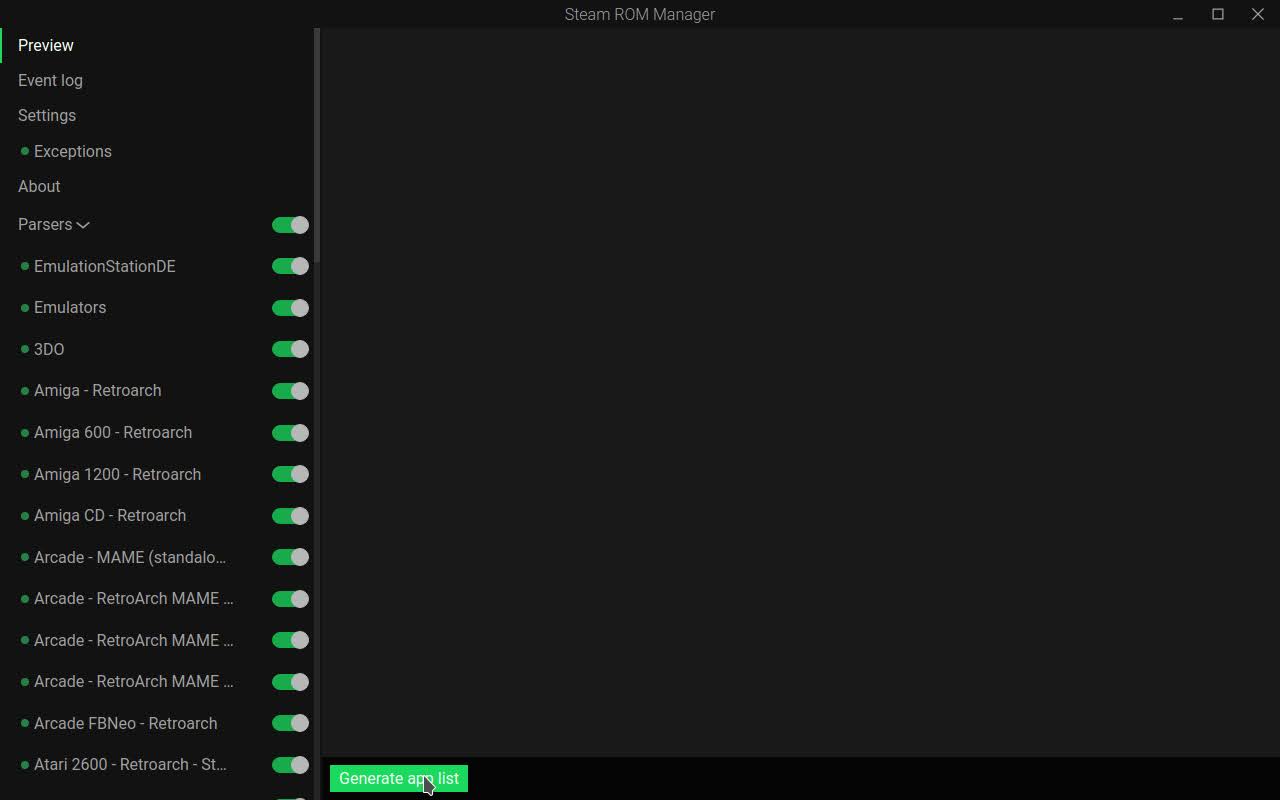
Once inside Steam ROM Manager, click “Preview” in the top-left corner.
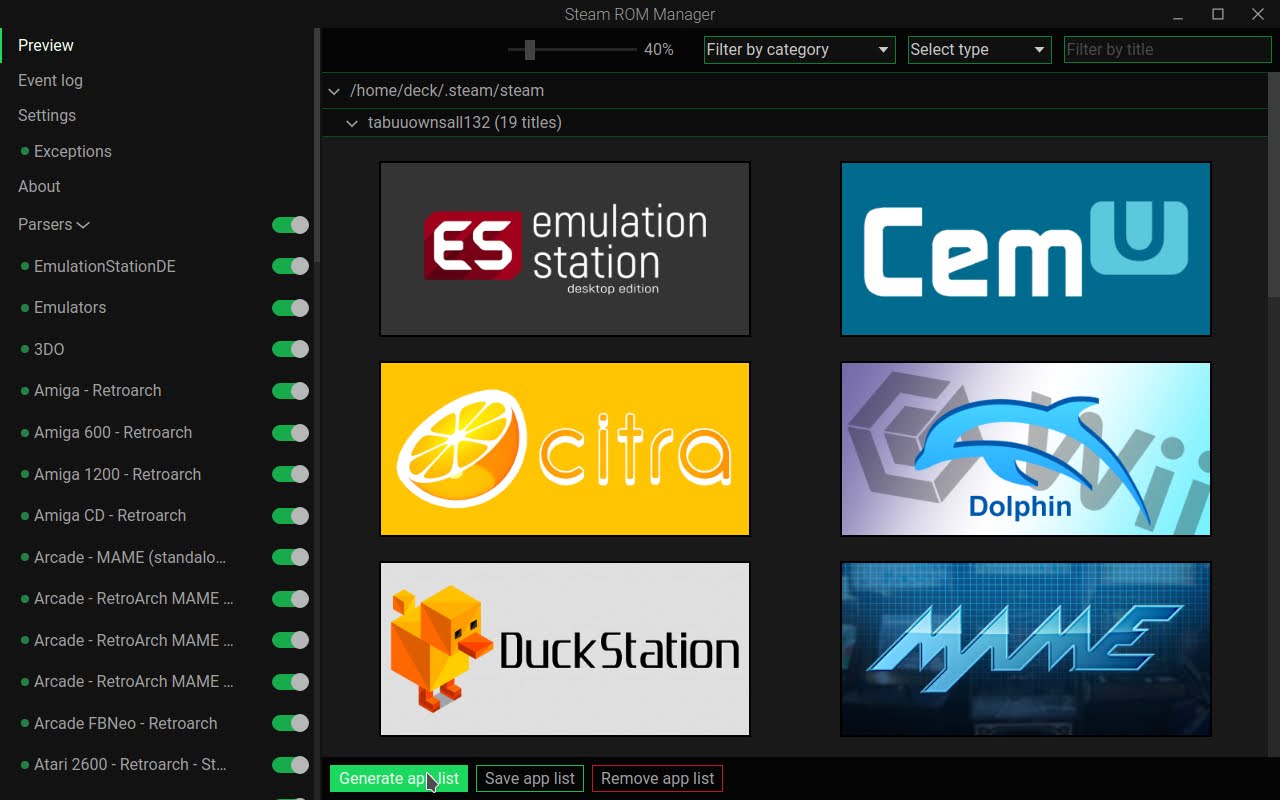
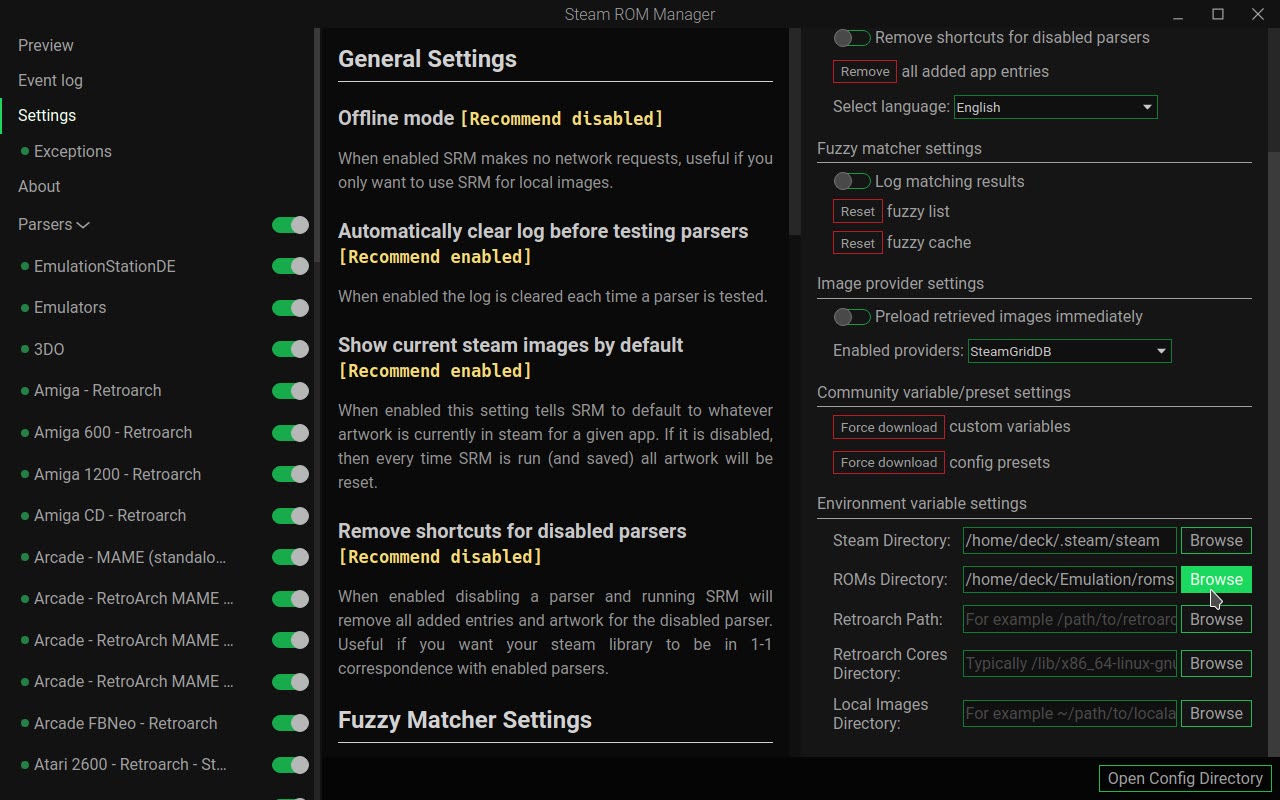
This preview will show you all of the shortcuts that are going to be installed into Steam, including any individual games that you might already have installed. The “Settings” button will also allow you to view or change the directories where your ROMs and emulators are installed. The defaults are pretty good, though, so I’ll stick with those for this guide.
Now, go ahead and click “Generate app list” at the bottom of the window in order to get all of these shortcuts installed.
You can close Steam ROM Manager for now, but come back here from the desktop shortcut if you ever want to add more emulators or individual game shortcuts.
Step 8: Reopen Steam After Running Steam ROM Manager
Once you’ve closed Steam ROM Manager, re-open Steam to verify that the install process worked. If it did, you should see a new Emulation collection in your Steam Library!
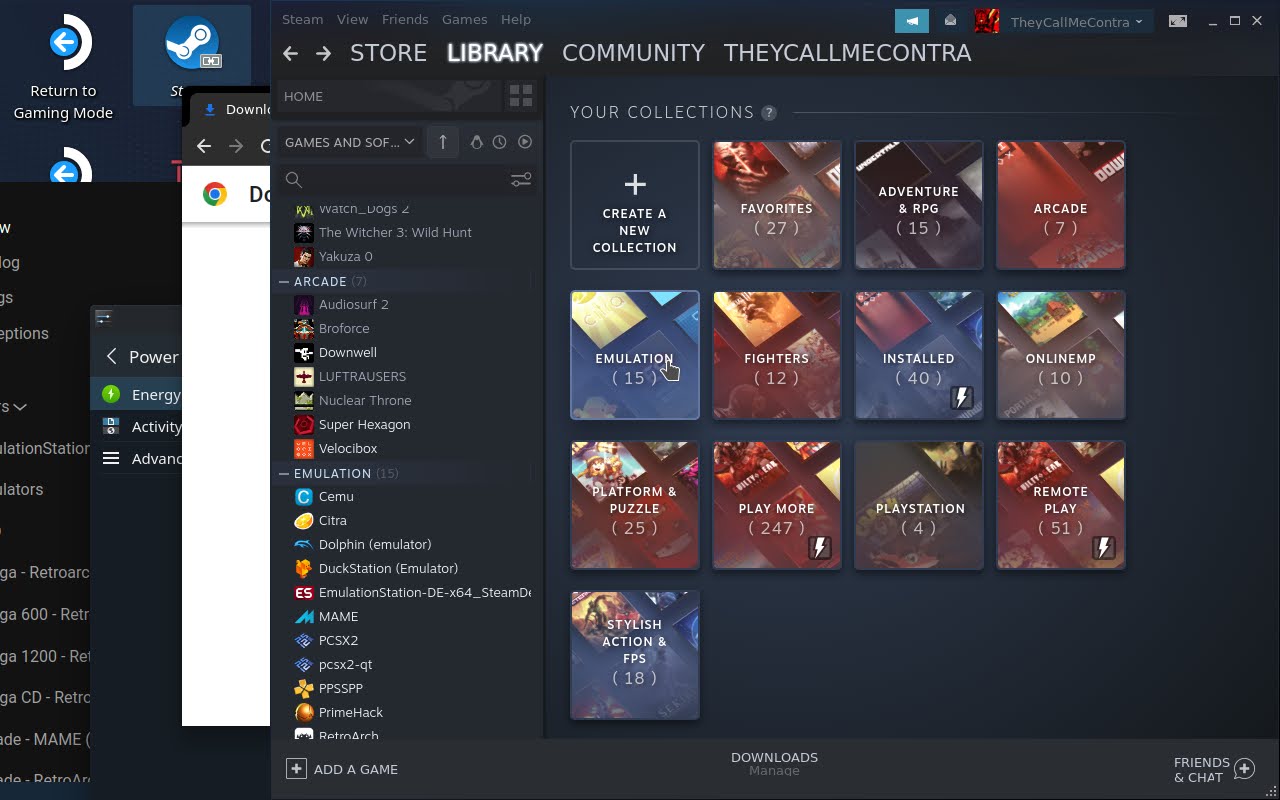
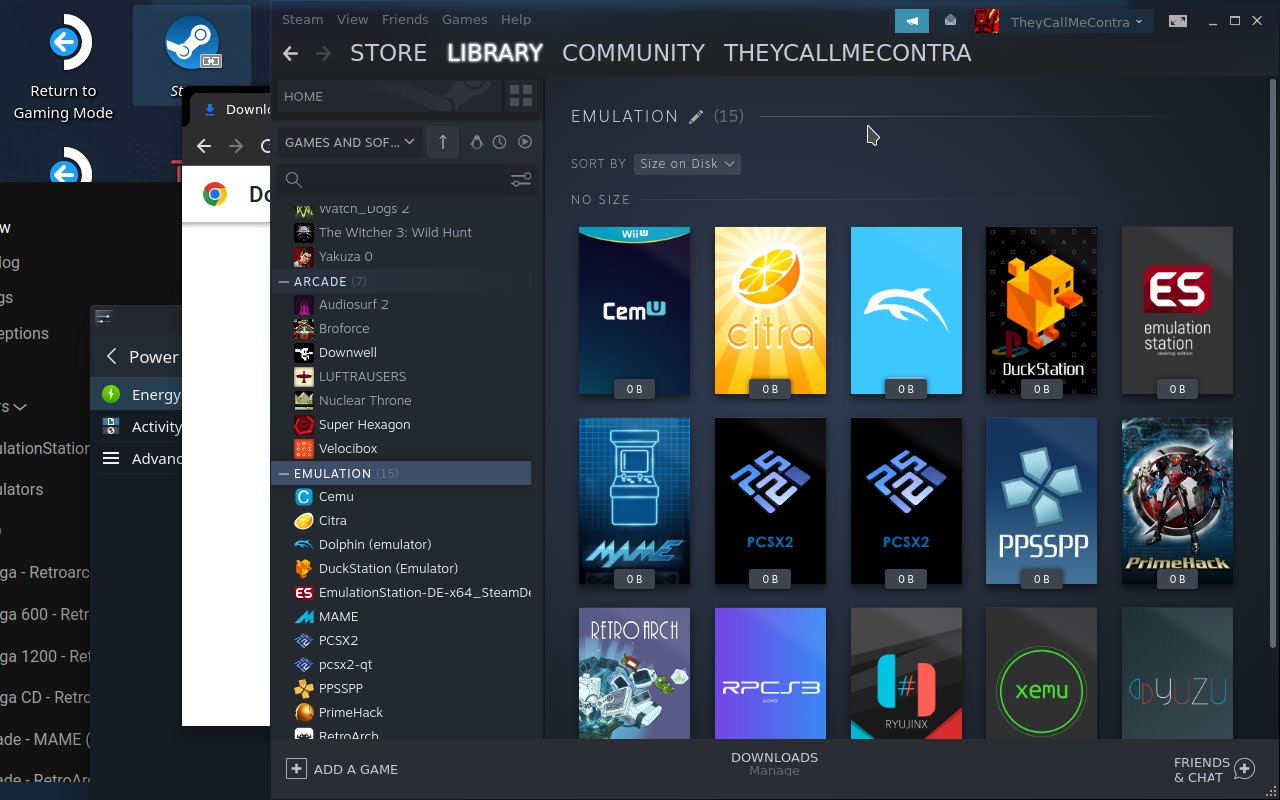
Inside of that Emulation Library collection will be all of your individual emulators and games.
And yes, these will all work back in Gaming Mode. Installation complete!
Where To Put ROMs and BIOS Files on Steam Deck
By default, following this guide will place all of your EmuDeck related files, including rom and bios folders, in the Home/Deck/Emulation directory on your Steam Deck.
To change this, head to Steam ROM Manager and click the Settings button, pictured in the screenshot below:
As far as acquiring ROMs, ISOs, and BIOs files…that’s out of the scope of this article, and most likely illegal if you aren’t getting them from your own personal backups. Emulate responsibly!
Parting Words
And that’s all, for now!
I hope that this article helped you get your favorite emulators up and running on your Steam Deck! If you enjoyed it, consider sharing it on Facebook or Twitter with the buttons below.
Otherwise, feel free to browse my other guides here on GamersDirector- I recommend my Steam Deck Settings Guide if you’re looking to optimize your in-game performance on Deck. Those settings will work with these emulators, too!